ClickUp is a project management tool I’ve used in my freelance business for the past few years. Now I’m using it as a worldbuilding tool to manage the notes and items for my world.
In this article I’ll show you how I’m using ClickUp to build Synthmark.
However, this is a work in progress, which means it’s less step by step guide and more here’s something you might like to try.
There are a number of great worldbuilding tools such as LegendKeeper and World Anvil, however as I already manage my writing process and projects through ClickUp it makes sense to keep my worldbuilding ideas there as well. At least to start with.
If you’d like to give this a go for yourself the first thing you’ll need to do is sign up for a free account on ClickUp. Then we can get into it.
Disclosure: I am a participant in the ClickUp Affiliate Program, and I may earn a commission if you click on my referral link and make a purchase. Purchases made through my referral link won’t cost you any more but they help to support the content on this blog.
Worldbuilding Framework
I like to build worlds using my Worldbuilding Framework which follows this structure:
- Universe
- Planet
- People
The Framework is there to keep my perspective on the approach, whether it’s macro or micro. For example, if I’m changing a physical law or defining magic then it’s most likely working at the Universe level. Where as when I’m designing a character who runs a local shop, that would be working at the People level.
By this point you should have an idea about the genre and theme for your world.
For Synthmark it’s a cyberpunk world with the usual retro noir, high tech low life themes running through it.
I’ve rambled enough so let’s get into ClickUp.
Starting your worldbuilding project in ClickUp
It’s worth taking a little time out to define ClickUp’s terminology so you can follow along with the rest of the article.
The reason we’re able to build a worldbuilding tool in ClickUp is due to the power of it’s hierarchy, it’s flexibility and it’s deep integration with other tools such as Google Docs.
I’ll show you screenshots of how I’ve setup my account to track my world.
But first.
There are 9 levels in the ClickUp hierarchy, but you only need to worry about 5 of them for now. They are listed below from highest to lowest:
- Workspaces = your entire organisation
- Spaces = a set project, department or team
- Folders = a collection of related lists
- Lists = a collection of related tasks
- Tasks = Items you want to track such as todo items or in our case different parts of your world.
And really the most important 2 are lists and tasks. Lists will define an aspect of the world such as settlements, factions, people etc and the tasks are the actual items. It should make more sense in the next section when I show you Synthmark’s layout.
Learn about ClickUp’s hierarchy on their website.
Prefer to watch a beginners guide? I’ve got you covered. Let me introduce you to Layla, she’s great at explaining ClickUp. Don’t forget you can signup to ClickUp and follow along.
The Synthmark Project layout
After setting up the Workspace I created a Space titled “SYMK – World bible”, this will hold the notes, ideas and things I’m creating for Synthmark. Inside the Space are 3 folders
- Universe
- Planet
- People
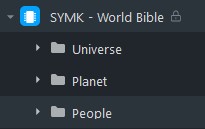
Each folder contains a list relating to the part of my world I’m working on. For example deities, people, factions, settlements etc.
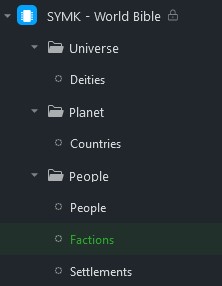
Factions
Synthmark is still a work in progress, but let me show you the factions list. If you’ve ever played Blades in the Dark then you may notice my faction table is inspired by the information listed for factions in Blades.
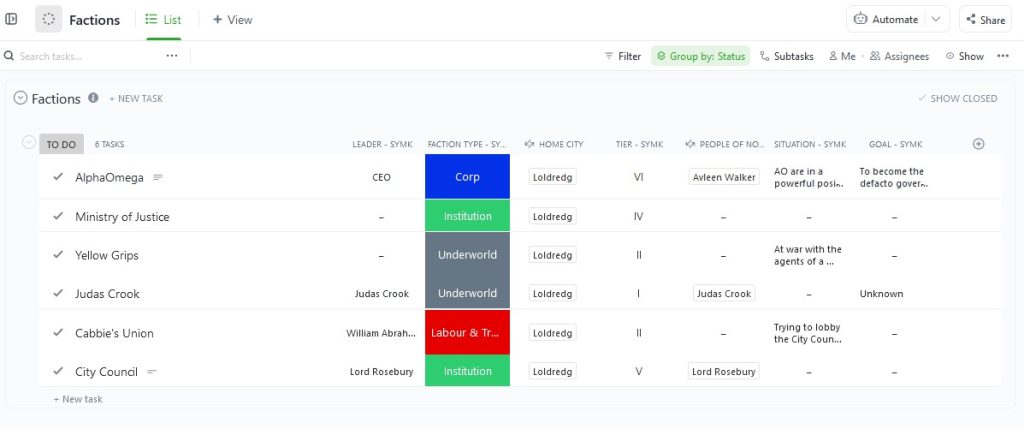
As you can see there are 6 factions listed here as tasks. I’ve also created a number of custom fields that lets me store and show useful information about each faction.
- Faction leader
who’s the most important person in this faction? - Faction type
Where does this faction sit in society? Is it part of the underworld or a civic institution? - Home city
Which settlement does this faction consider home? This field is linked to the Settlement list and pulls it’s options from that list. - Tier
How powerful is this faction? Tiers from 1 to 6 with 6 being the most powerful. - People of note
Interesting characters or NPCs that have affiliations with this faction. This field is linked to the People list. - Situation
Gives a plot hook for this faction. Maybe they’re fighting another faction, which is the case for the Yellow Grips. Or perhaps the faction is on the brink of a civil war. - Goal
What’s the Faction’s main objective? For example AlphaOmega are the biggest corp in the main city of Loldredg and their goal is to replace the City Council as the de facto government.
Situations and Goals set the scene for interesting conflict between the factions. For me this is what makes the world come alive in my head. Add in people affiliated to those factions while also having their personal objectives – it adds another layer.
And now I have a place where deep interesting stories can breed in my imagination.
People
Next I’ll be working on the People list to define useful details to store – these again will be added as custom fields. Currently the People list has their home city, country, faction affiliation and position/rank.
I don’t want to go overboard here tracking specific attributes such as height, favourite food etc. The goal is to give a flavour of a character so they can populate the world. Later on I expect to delve deeper into a character if they come up in a story plot I’m writing (or they would be useful to a story plot).
Here’s what I have so far:
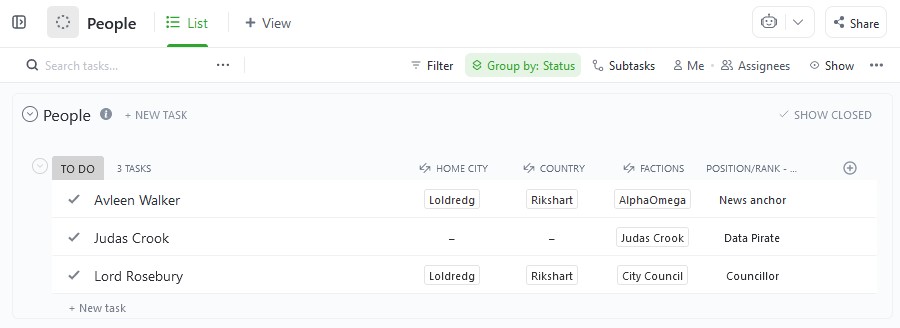
Adding a goal/objective field and a generic like/dislike field would add points of interest while still being flexible.
