Step 1: Typography
Typography is the art of making text look pretty on your map. For this part of the tutorial you will need to make sure the character menu is visible.
Window > Character (when you click it a tick should appear)
Now I like to start with the main regions and oceans then work down in detail. You may have already created the names for your map, however if you have still to create some then I recommend using a random name generator.
One of the best name generators is by Rink Works and it allows you create templates for your words. However, if you don’t know much about linguistics then this generator can seem a little daunting at first.
A simple and fun generator to use is by Muddle from the Cartographers Guild. This is the generator I will be using for this map.
Regions
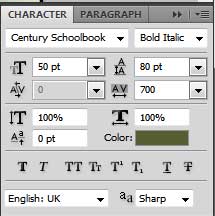
I’ve included a screenshot of the settings I’ve used for the main regions of the map.
Regions > font Century Book, colour #575c33, style bold italic, size 50pt, line space 80pt, character spacing 500-700pt
Then when you type I find it looks best if your regions are in all capitals. So all you need to do is type in the location of each region.
Oceans
For labelling the main oceans on your map use the exact same formatting as for the regions however change the colour to #2f4f73.
Oceans > Same as regions except colour = #2f4f73
Nations and Seas
After marking the regions and oceans you want to move on and mark the nations and smaller seas. These can be done in much the same way however with a slightly smaller font size and spacing.
Type tool > font size 20px, character spacing 300
Cities
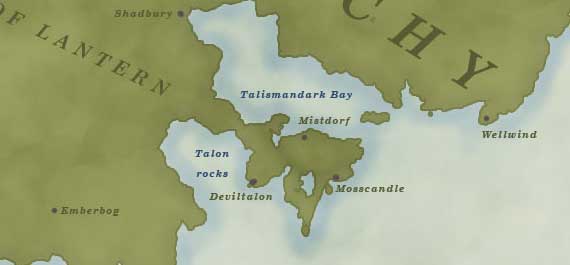
To mark the location of a city simply use a small grey circle. The properties for the circle can be seen below.
New layer “Cities” > brush 100% hardness, 5px, #54504f
Then next to each circle place the name of the city.
Type Tool > font Century Book, colour #575c33, style bold italic, size 10pt, line space 15pt, character spacing 100pt
You can also use the same style and size type for marking places of interest.
Step 2: Boarder
The boarder is made from a 2×2 checker tile. The first thing you need to do is to extend the canvas size by 20 pixels. This is why you originally created the canvas at 2080 pixels x 2080 pixels.
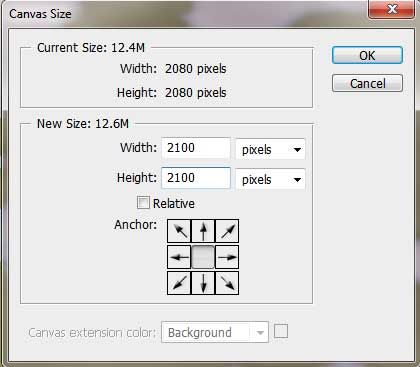
Image > Canvas Size > height 2100, width 2100
Before you click ok make sure that the middle button is clicked out of the 9 buttons as this will ensued that your map stays in the centre of the extended canvas. See the image below:
Making The Checker Board
Create a new file with a width of 200 pixels and a height of 200 pixels.
File > New > Height 200, Width 200
Then you want to click on the rectangular marquee tool. Change its style to fixed size with a width of 100 pixels and a height of 100 pixels.
Rectangular Marquee Tool > fixed size > width 100, height 100
With this tool selected click on the top left corner of the canvas. You should now see a box appear, fill this box with black and repeat for the bottom right corner.
Marquee Tool > Fill
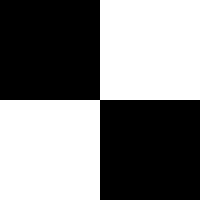
You will end up with a tile that looks like this.
Starting on the left corner place the tile and then duplicate it, moving the duplicate tile along the top and repeating until the whole top row has been completed. Then merge the row together into one row.
Merge layers by selecting the layers you wish to merge then right click and select “merge layers”
You then want to repeat this procedure for the two sides of your map.
Finished Map
Having added the typographer and the border to your map you have now completed it! Feel free to go back and add extra features such as mountains, trees, rivers and marshes if you so desire however the beauty of this map is that it does work without any of those features.


